Vision Conveyor Calibration (Circular Conveyor)
Follow these steps to calibrate a circular vision conveyor:
KEY POINTS
- When teaching part positions with the robot during calibration, it is important to position X, Y, and Z of each point accurately. The conveyor is calibrated in X, Y, Z, U, V, and W.
To accurately perform teaching, see the following.
Tips for Conveyor Calibration - In steps 13, 17, and 19, move the robot directly above workpiece 1 and teach the position. To perform an accurate calibration, set as wide a distance as possible between the points to be taught in steps 13, 17, and 19.
- Select [Tools]-[Conveyor Tracking].
- Select the conveyor you want to calibrate.
- Select [Vision] for the [Type].
- Select [Circular] for the [Motion].
- Select the conveyor rotating direction for the [Direction].
KEY POINTS
Be careful not to calibrate with a wrong direction, otherwise, the robot will not track the parts.
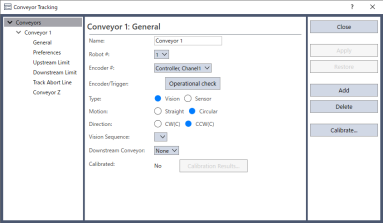
Set the [Vision Sequence].
Click the [Apply] button.
Click the [Calibrate] button.
The [Conveyor Tracking Calibration] wizard is displayed.
Follow the instructions displayed on the screen to confirm the settings of the conveyor encoder, the tool coordinate system, and the vision sequence.
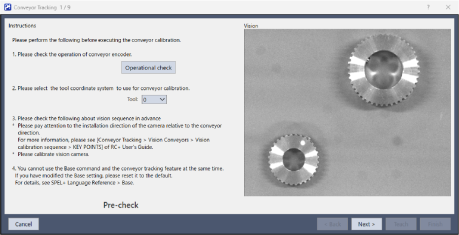
Check if the conveyor direction shown in the wizard is the same as the conveyor you want to use.
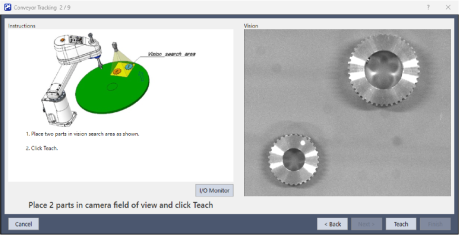
Place two parts on the conveyor as shown in the figure in the wizard.
Select the [Vision] tab to see live video. The camera orientation may not be the same as the picture.
Arrange the parts to be inside the range correctly and click the [Teach] button.
Move the conveyor until both parts are within reach of the robot. Do not move the parts, only the conveyor. Proper calibration cannot be performed unless the encoder pulse count value changes according to the workpiece position.
Click the [Jog & Teach] button.
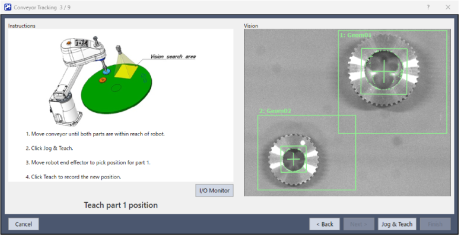
The [Jog & Teach panel] will appear. Click the jog buttons to move the robot end effector to the pick position for Part 1.
Click the [Teach] button.
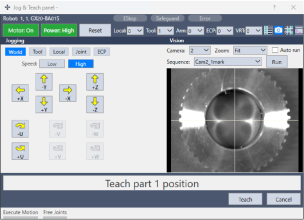
Click the [Jog & Teach] button.
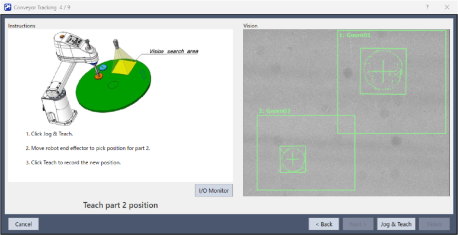
The [Jog & Teach panel] will appear. Click the jog buttons to move the robot end effector to the pick position for Part 2.
Click the [Teach] button.
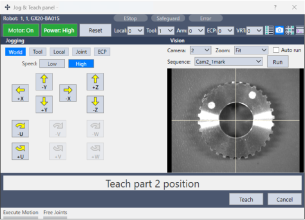
Remove Part 2. Move the conveyor to move Part 1.
Click the [Jog & Teach] button.
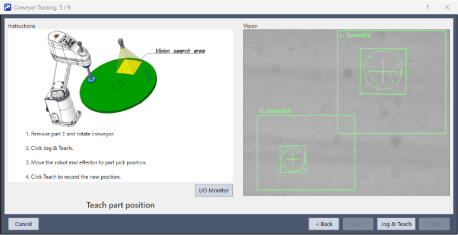
The [Jog & Teach panel] will appear. Click the jog buttons to move the robot end effector to the pick position.
Click the [Teach] button.
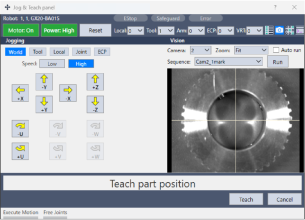
Move the conveyor by hand to move Part 1. Proper calibration cannot be performed unless the encoder pulse count value changes according to the workpiece position.
Click the [Jog & Teach] button.
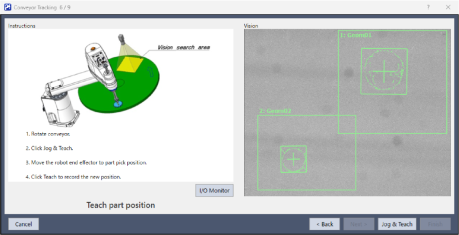
The [Jog & Teach panel] will appear. Click the jog buttons to move the robot end effector to the pick position.
Click the [Teach] button.
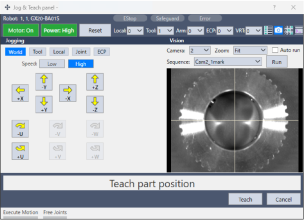
Place a part on the upstream limit.
Click the [Jog & Teach] button.
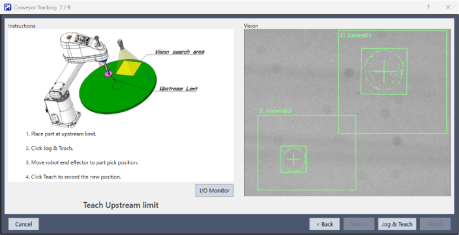
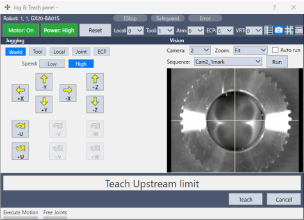
The [Jog & Teach panel] will appear. Click the jog buttons to move the robot end effector above the part.
Click the [Teach] button.
Move the conveyor so the part is at the downstream limit.
Click the [Jog & Teach] button.
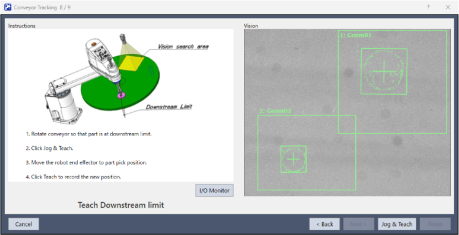
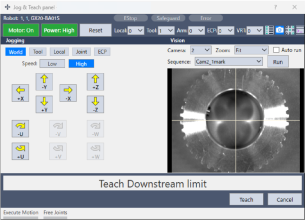
The [Jog & Teach panel] will appear. Click the jog buttons to move the robot end effector above the part.
Click the [Teach] button.
The calibration complete picture will be displayed.
Click the [Finish] button.
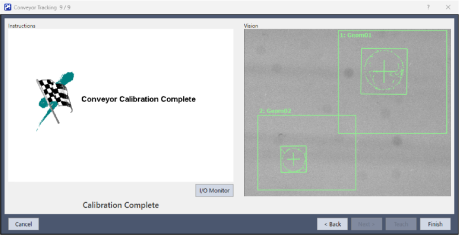
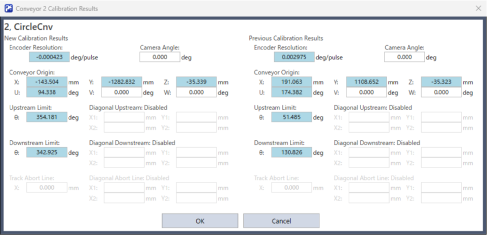
The Calibration Results screen is displayed.
- Click the [OK] button to complete the calibration.
- Click the [Cancel] button to return to the Calibration Complete screen in step 25.