Version Control for SPEL+ Projects
This function provides Git-based version control for SPEL+ projects in RC+.
This function allows multiple users to develop the same project in parallel for more efficient development. It also provides functions for tagging and restoring previous versions.
You can select from the following modes for this function.
| Mode | Description |
|---|---|
| Basic mode | A mode that provides the functions required for routine version control through simple operations. |
| Advanced mode | A mode that enables flexible development and version control using Git functions such as creating, switching, and merging branches. |
Starting Version Control and Basic Mode Operations
For operating instructions, refer to the video below. (Playback starts at the relevant section.)
Advanced Mode Operations
In advanced mode, you can perform the following operations.
- Record and share project changes
- Commit
- Push
- Fetch
- Pull
- Manage branches
- Create branch
- Switch branch (checkout)
- Delete branch
- Merge
- Manage tags
- Create tag
- Push tag
- Delete tag
- Other
- Volume settings
- Copy project
- Save the project with a name
- Open shared project
- Open specific version
- End version control
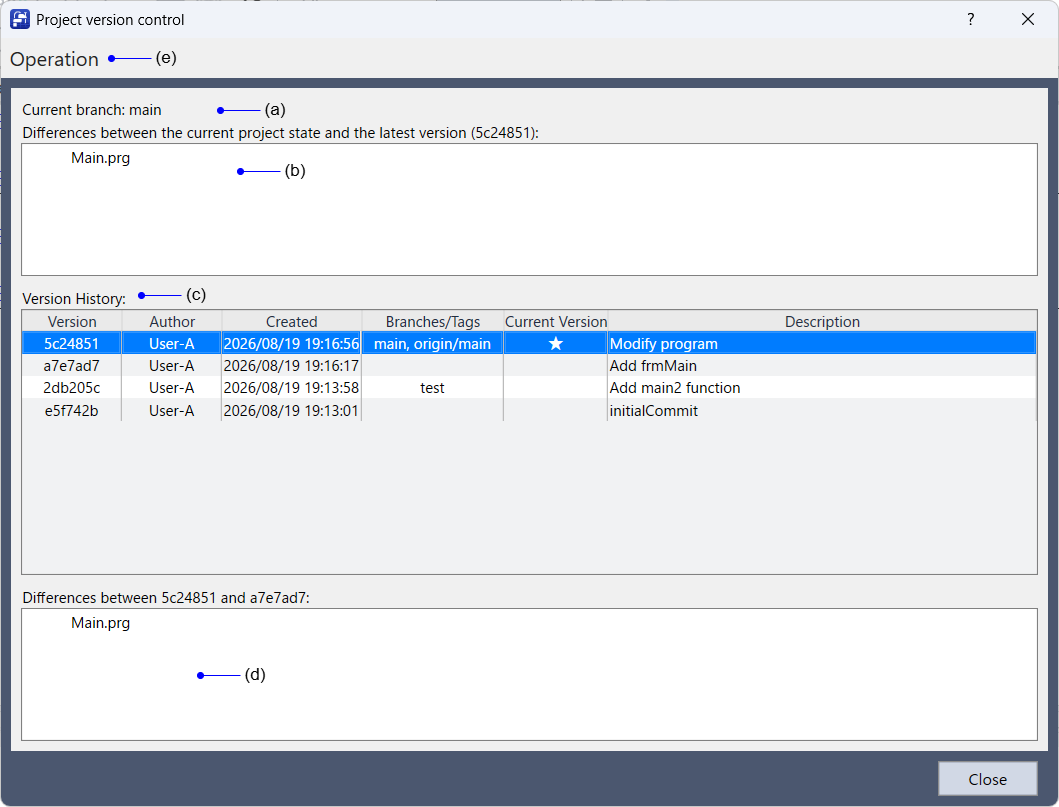
| Symbol | Description |
|---|---|
| a | Displays the name of the branch currently being worked on. |
| b | Displays the differences between the latest version under version control and the current project state. |
| c | Displays the version history. Right-click a row to display the following menu. - Open This Version - Create Branch - Creating tag |
| d | Displays the differences between the version selected in "c" and the previous version. |
| e | Displays the operation menu.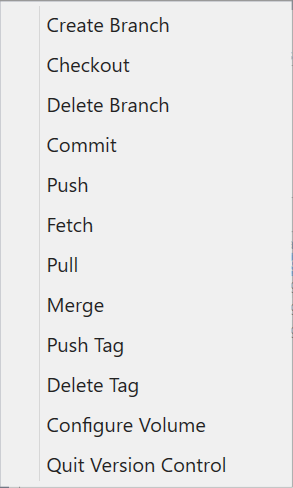 |
Recording and Sharing Project Changes
Commit
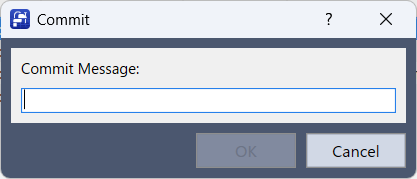
Commits the differences from the latest version under version control.
- On the operation menu, click [Commit].
- Enter a commit message.
- Click [OK].
Push
Applies the commits in the local repository to the remote repository on the volume.
Click [Push] on the operation menu to upload the contents of the current branch to the volume.
KEY POINTS
Before pushing, the same branch may have been updated by another user.
If so, pull first to incorporate the remote changes.
If the upload destination volume has not been set, select "Configure Volume" first.
Fetch
Retrieves the latest information from the remote repository.
Fetch retrieves only information such as branches and tags and does not affect the current work.
Click [Fetch] on the operation menu to retrieve the latest information from the volume.
After fetching, you can check the latest remote branches and tags.
KEY POINTS
To check changes made by other users, we recommend fetching before pulling.
Pull
Incorporates changes from the remote repository into the current working branch.
Click [Pull] on the operation menu to retrieve the contents of the remote branch corresponding to the current branch and apply them to the local repository.
To incorporate changes made by other users, perform a pull.
If there are changes that cannot be merged, a conflict occurs and must be resolved. For details, see "Resolving Conflicts".
KEY POINTS
If there are uncommitted changes, we recommend committing them beforehand.
Managing Branches
Creating a Branch
Creates a branch.
To start working on the created branch, select [Switch Branch].
- On the operation menu, click [Create Branch].
- Select the base (HEAD, Branches/Tags, or Version) from which to create the branch.
- Enter the branch name.
- Click [OK].
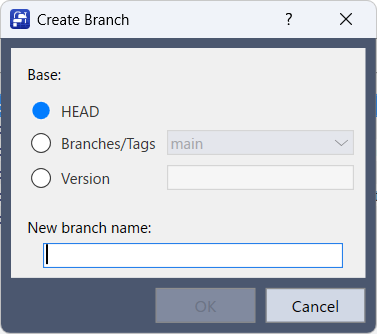
| Item | Description |
|---|---|
| HEAD | Creates a branch based on the currently checked-out version. |
| Branches/Tags | Creates a branch based on the specified branch or tag. |
| Version | Creates a branch based on the specified version (commit). |
Also, in the version history, right-click any version and select [Create Branch] to display the [Create Branch] dialog box with that version as the base.
KEY POINTS
- Half-width alphanumeric characters and symbols can be used in branch names.
- Specify the branch name using no more than 50 characters.
- Names that violate Git naming conventions or existing branch names cannot be specified.
- Separating branches for feature development and bug fixes makes parallel development by multiple users easier.
Switching Branches (Checkout)
Switches the branch to work on.
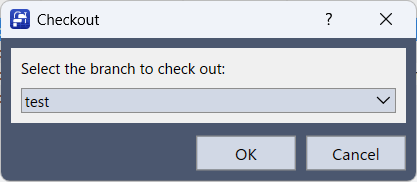
- On the operation menu, click [Checkout].
- Select the branch to check out.
- Click [OK].
KEY POINTS
If there are changes in progress, we recommend committing them before switching branches.
Deleting a Branch
Deletes a branch that is no longer needed.
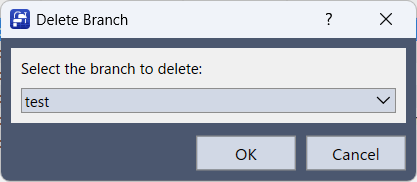
- On the operation menu, click [Delete Branch].
- Select the branch to delete.
- Click [OK].
KEY POINTS
The following branches cannot be deleted.
- The currently checked-out branch
- main branch
- Default branch of the remote repository
Branches in the branch list that begin withremotes/origin/are stored in the remote repository.
Deleting a branch may prevent other users from referencing it. Confirm that deletion will not cause problems before proceeding.
Merge
Merges changes from another branch into the current branch.
Click [Merge] on the operation menu to display the [Merge] dialog box.
Select the branch to merge and click [OK].
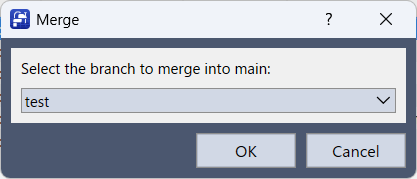
If there are no conflicts, the merge is completed automatically.
If a conflict occurs, resolve the conflict.
Resolving Conflicts
A conflict may occur when multiple users make different changes to the same location.
When a conflict occurs, the [Conflicting File List] dialog box is displayed.
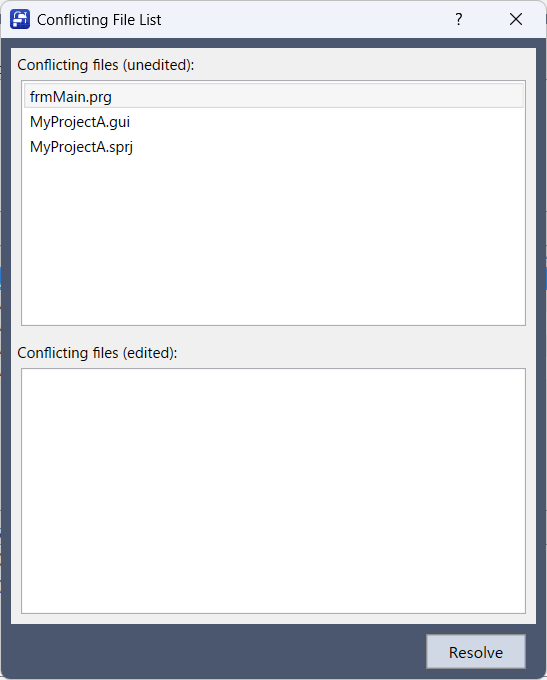
Resolve the conflict using the steps below.
- Select the target file from the unedited files and double-click it.
- Review the conflict and select the changes to apply.
For program files:
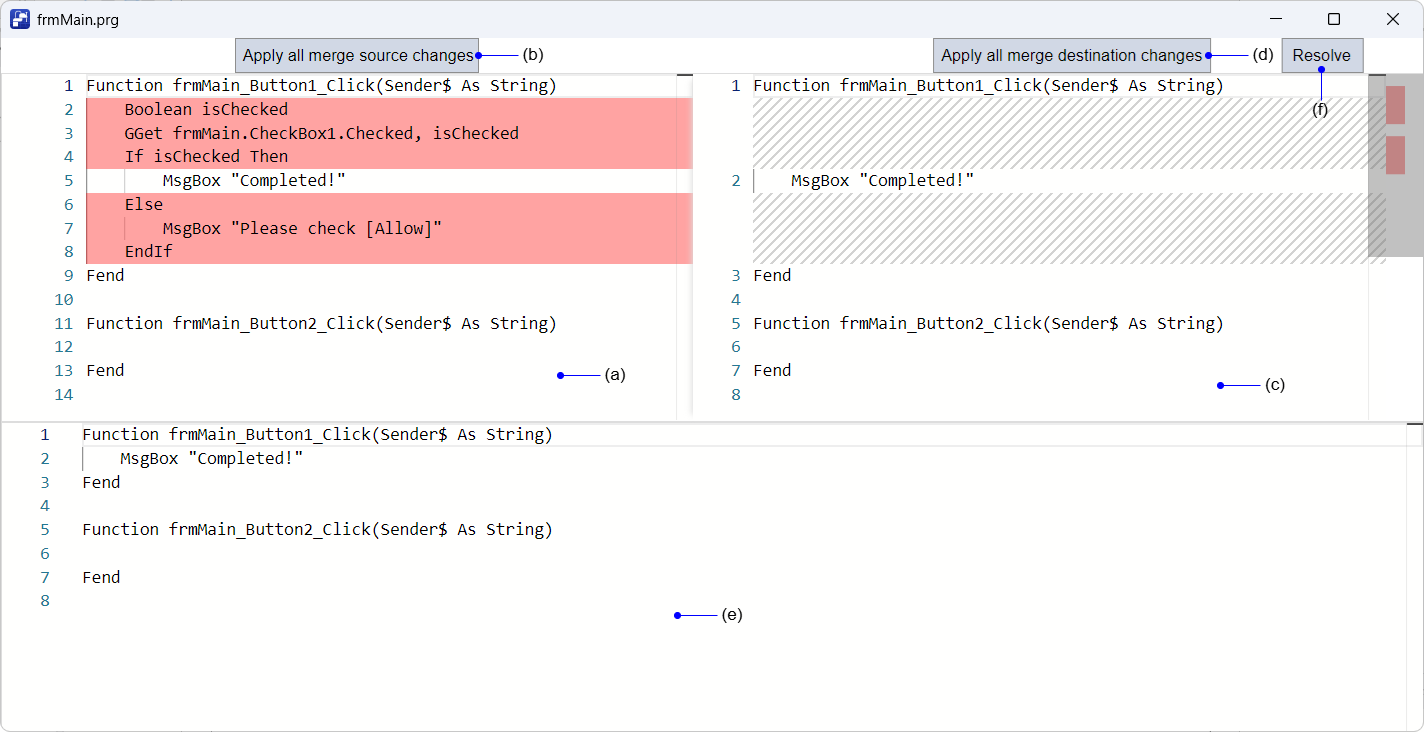
The following [Conflict Resolution] dialog box is displayed.
Determine the content to apply and click [Resolve].
| Symbol | Description |
|---|---|
| a | The merge source code is displayed. |
| b | Applies all changes from the merge source. |
| c | The merge destination code is displayed. Right-click a difference location to display the [Apply] menu and apply only part of the change. |
| d | Applies all changes from the merge destination. |
| e | The code to apply is displayed. You can also edit it manually. |
| f | Resolves the conflict using the content in (e). |
For other files:
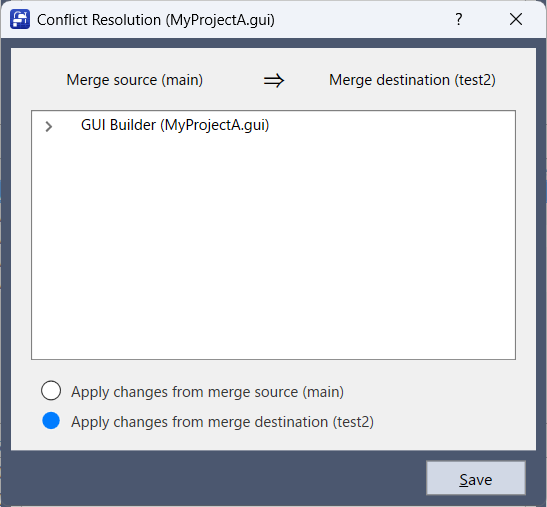
The following [Conflict Resolution] dialog box is displayed.
Select the changes to apply (merge source or merge destination), and click [Save].
3. Resolve all conflicts and mark the files as edited.
4. Click [Resolve].
Managing Tags
Creating a Tag
Creates a tag. A tag assigns a name to a specific commit.
For example, tagging important versions such as releases or evaluation versions allows you to easily reference those states later.
- Select the target commit from the version history.
- Right-click the commit and click [Create Tag].
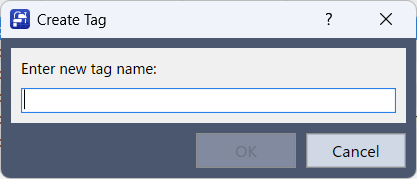
- Enter the tag name.
- Click [OK].
KEY POINTS
Half-width alphanumeric characters and symbols can be used in tag names.
Specify the tag name using no more than 30 characters.
Names that violate Git naming conventions or existing tag names cannot be specified.
Pushing Tags
Uploads locally created tags to the remote repository.
To share a tag with other users, push the tag after creating it.
- On the operation menu, click [Tag Push].
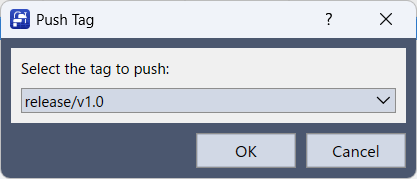
- Select the tag to push.
- Click [OK].
Deleting a Tag
Deletes a tag that is no longer needed.
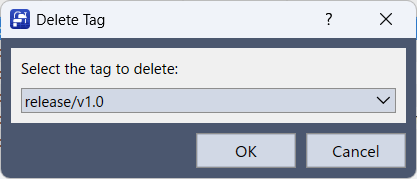
- On the operation menu, click [Delete Tag].
- Select the tag to delete.
- Click [OK].
KEY POINTS
Tags in the tag list that begin with refs/tags/ are stored in the remote repository. Deleting a tag may prevent other users from referencing it. Confirm that deletion will not cause problems before proceeding.
Other
Volume Settings
Configures and checks the volume used to store the version-controlled project.
Configuring a volume enables remote operations such as push and pull.
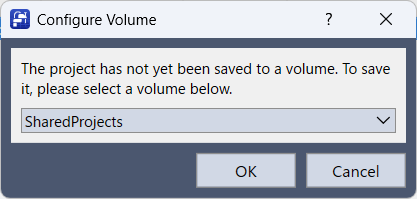
Click [Configure Volume] on the operation menu to display the [Configure Volume] dialog box.
- If a volume has not been configured:
If no volume was specified when version control was started, you can configure a volume as the storage destination.
Select a volume and click [OK].
KEY POINTS
A volume cannot be configured if a project with the same name exists on the volume.
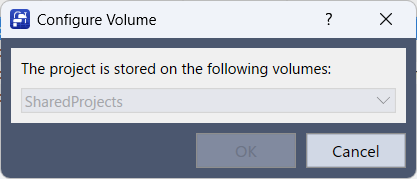
- If a volume has been configured:
The volume where the project is stored is displayed.
A configured volume cannot be changed.
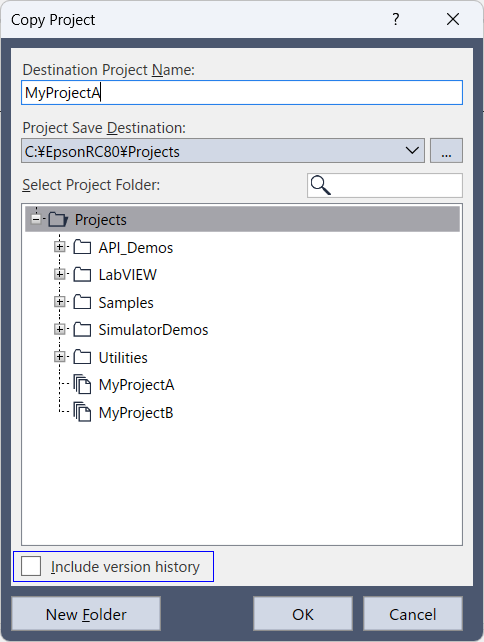
Copy Project
Copies the project to another location.
For a project under version control in advanced mode, the copy method differs depending on whether the project is stored on a volume.
Projects stored on a volume:
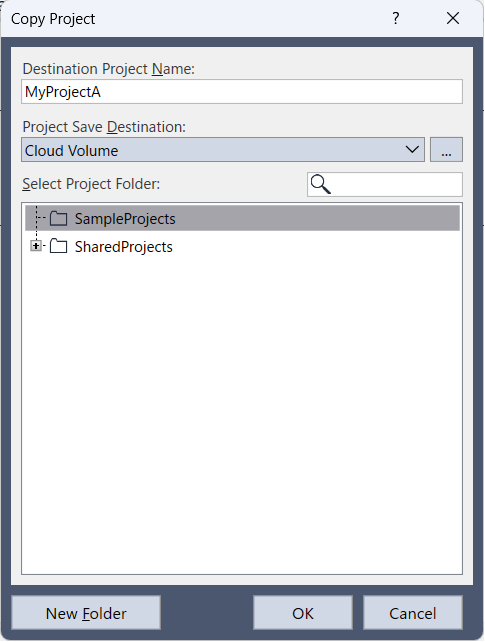
For a project with volume settings, you can select a local folder or a volume as the copy destination.- When copying to a volume
- The project can be copied with its Git history.
- You can select another volume as the copy destination.
- The project name cannot be changed.
- When copying to a local folder
- The Git history cannot be copied.
- After copying, the project is treated as a standard project.
- When copying to a volume
Projects without volume settings:
A project without volume settings can only be copied to a local folder.
In this case, you can select [Include version history].
| Item | Description |
|---|---|
| Include version history | When selected, the project is copied with its Git history. When not selected, the project is copied without its Git history. |
Save Project As
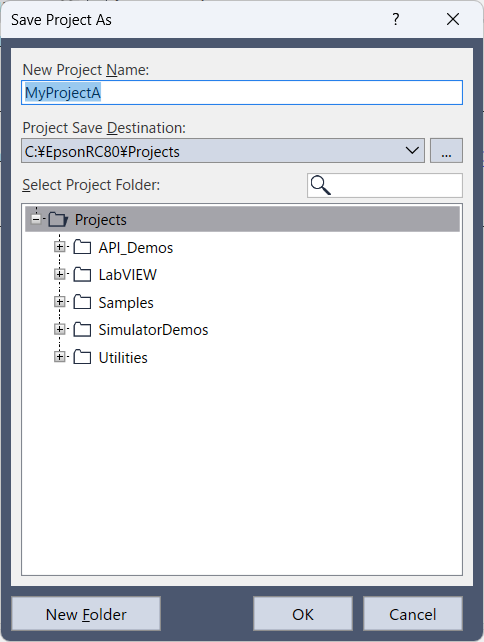
For a version-controlled project, [Save Project As] follows the same rules as [Copy Project].
For details, see "Copy Project" below.
Opening a Shared Project
Opens a project shared by another user.
- On the [Project] menu, click [Open Project].
- Set the project storage location to [Cloud Volume].
- Select the shared project you want to open.
- Click [OK].
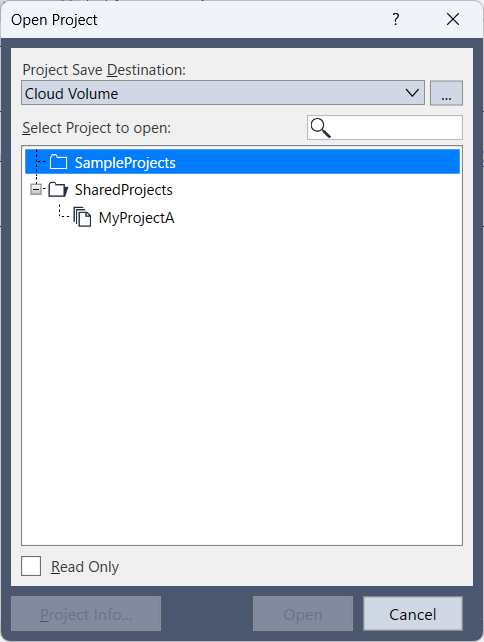
If the project is already stored locally, it opens directly.
If the project is not stored locally, it opens after being downloaded from the volume.
Opening a Specific Version
Opens a previous version displayed in the version history.
- Select the version you want to open from the version history.
- Right-click and click [Open This Version].
- Click [OK] in the confirmation message.
KEY POINTS
When a previous version is open, the displayed content differs from the latest state of the current working branch. To return to the latest state, perform [Checkout] and switch to the working branch.
Ending Version Control
Ends version control for the project.
- On the operation menu, click [Quit Version Control].
- Review the confirmation message.
- Click [OK].
For a project with volume settings, you can select where to save the project after ending version control.
If you do not need to save the project, click [Cancel] in the [Save Project As] dialog box.
KEY POINTS
Projects already stored on the volume are not deleted. Version control ends only for the local project.