Position Teaching
The following describes how to teach a start position of "Screw Driving" motion.
Click Epson RC+ menu-[Tools]-[Robot Manager]. The [Robot Manager] dialog box appears.
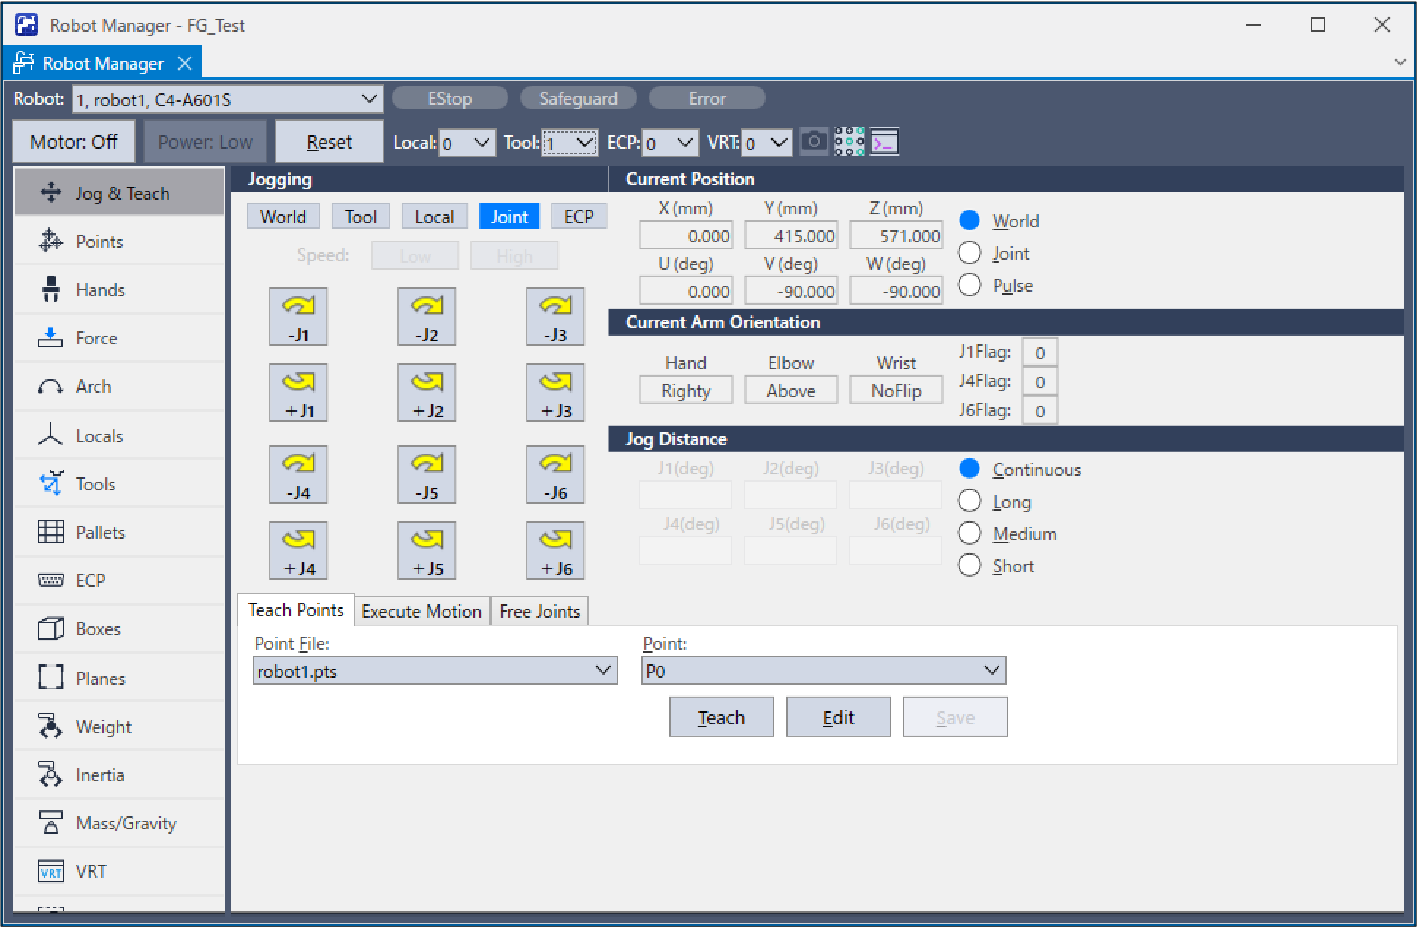
Select [Jog & Teach] and open the panel.
Select "1" on [Tool].
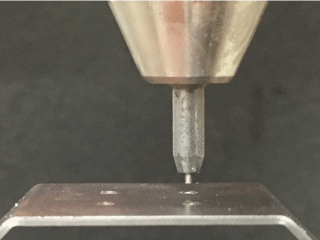
An electric screwdriver attaches to a screw.
Use the Jog button to move the robot to the following positions.
- X and Y directions : The end of the screw is within the taper part of the screw hole
- Z direction : The end of the screw is 1mm above the screw hole
Select "P1" in the [Point] dropdown.
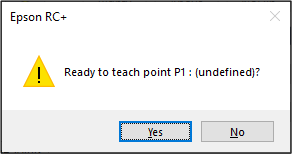
Click the [Teach] button. The following message is displayed. Confirm the message and click the [Yes] button.
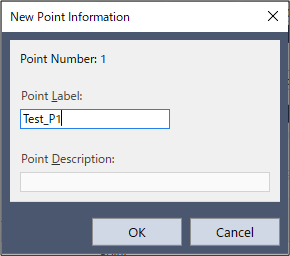
The [New Point Information] dialog box is displayed. Enter "Test_P1" on [Point label]. Click the [OK] button.
Click Epson RC+ menu-[File]-[Save All]. The file is saved.